Table of Contents
Introduction to Brazilian Cheese Bread Recipe
What Is Brazilian Cheese Bread Recipe?
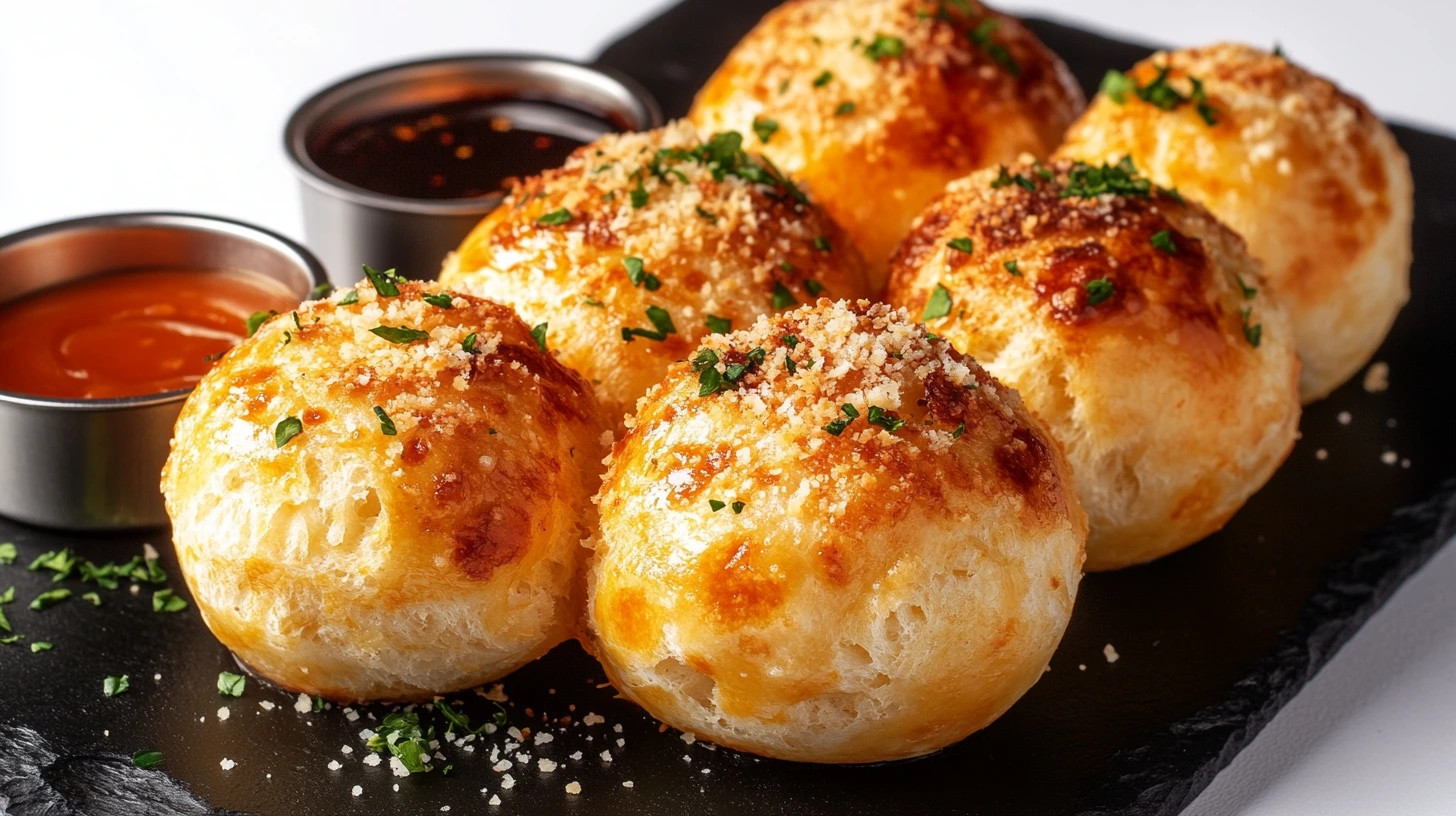
Brazilian Cheese Bread Recipe, or Pão de Queijo, is a beloved gluten-free bread roll that is crispy on the outside, soft and chewy on the inside and packed with cheesy goodness. Made from tapioca flour, cheese, eggs, and milk, these bite-sized delights are a staple in Brazilian cuisine and are enjoyed as a snack, breakfast item, or accompaniment to meals. Their naturally gluten-free composition makes them a popular choice for those with dietary restrictions while still being irresistibly delicious.
Brief History and Cultural Significance
Pão de Queijo is rooted in Minas Gerais, Brazil, where it is deeply embedded in the local culinary tradition. Its origins date back to the 18th century, during Brazil’s colonial period when enslaved African people and local cooks adapted recipes using available ingredients. Tapioca starch, derived from cassava (a native Brazilian crop), was used as a substitute for wheat flour, which was scarce. Over time, local cheeses were added, creating the recipe we know today.
This iconic bread has become a symbol of Brazilian hospitality and comfort food. It is often served with coffee, making it a popular breakfast or afternoon treat. Beyond Brazil’s popularity, it has grown internationally, with many variations and adaptations appearing in bakeries and homes worldwide.
Key Ingredients for Brazilian Cheese Bread Recipe
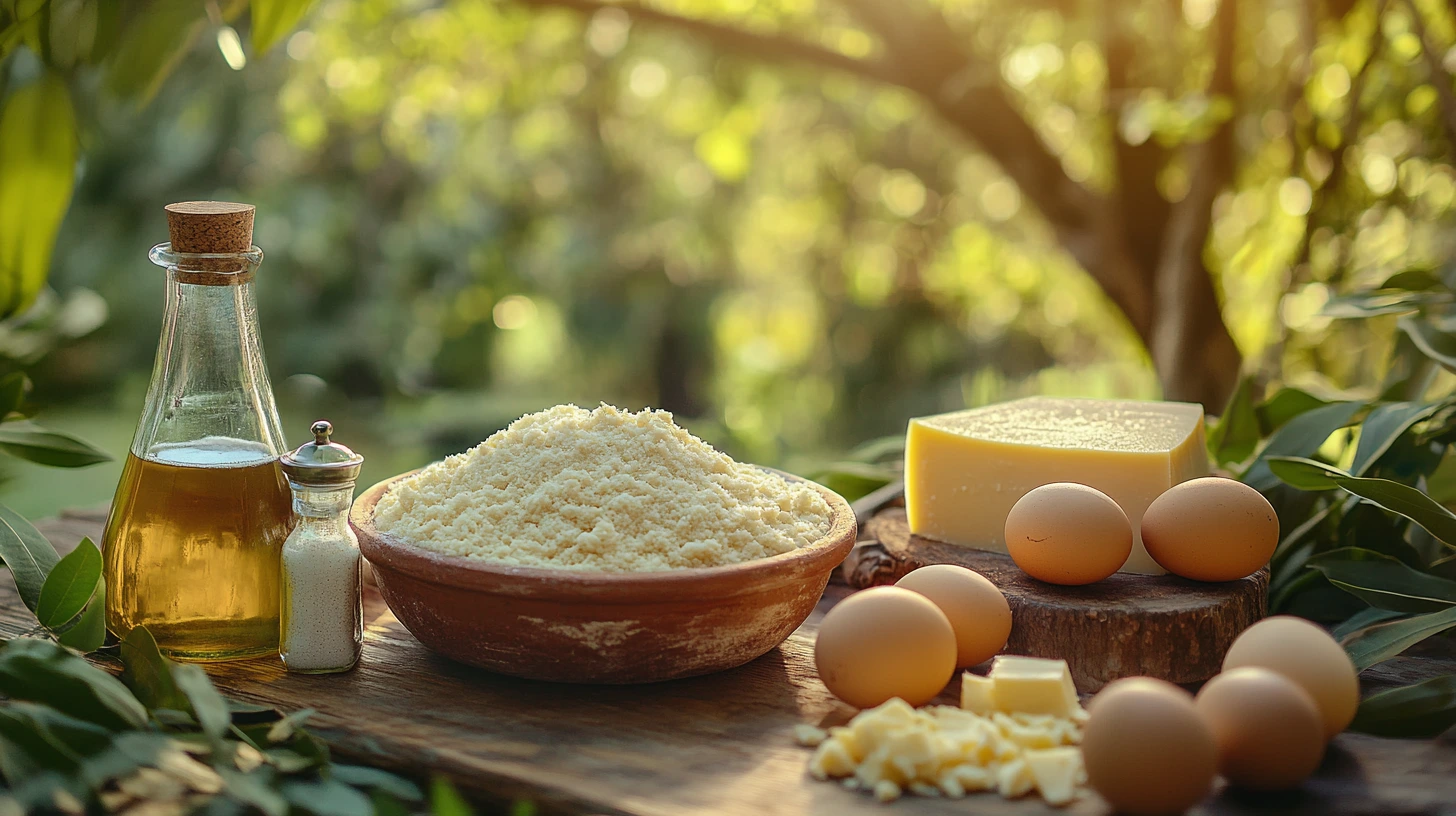
To achieve the traditional flavor and texture of Pão de Queijo, it’s essential to use the right ingredients. Here’s a breakdown of the key components:
- Tapioca Flour (Starch)
- Role: Tapioca flour is the foundation of Pão de Queijo. It gives the bread its characteristic chewiness and makes it naturally gluten-free.
- Where to Find It: Available in most grocery stores, specialty Latin markets, or online.
- Substitutions: None—tapioca flour is crucial for authenticity.
- Cheese
- Traditional Choices:
- Minas Cheese: Minas cheese is a traditional Brazilian cheese known for its mild flavor and crumbly texture.
- Alternative Options: Parmesan, mozzarella, or a mix of both are common substitutes outside Brazil.
- Role: Provides flavor, richness, and the signature cheesy aroma.
- Eggs
- Role: Eggs act as a binding agent and contribute to the light, fluffy interior.
- Tips: Use room-temperature eggs for smoother blending.
- Milk
- Role: Milk adds moisture to the dough and helps dissolve the tapioca flour, creating a cohesive batter.
- Options: Whole milk is ideal for a rich flavor, but plant-based milk can be used for dairy-free adaptations.
- Oil or Butter
- Traditional Ingredient: Neutral oils like vegetable or sunflower oil are commonly used.
- Optional Alternative: Melted butter adds a richer flavor.
- Role: Ensures the dough is smooth and adds slightly crispness to the exterior.
- Salt
- Role: Enhances the flavors of the cheese and tapioca flour. Adjust according to the saltiness of your chosen cheese.
Ingredients
- 1 cup milk (whole milk preferred)
- 1/2 cup vegetable oil (or melted butter)
- One teaspoon salt
- 2 cups tapioca flour (starch)
- 1 cup grated Parmesan cheese (or a mix of Parmesan and mozzarella)
- Two large eggs (at room temperature)
Instructions
- Preheat the Oven
- Preheat your oven to 375°F (190°C). Line a baking sheet with parchment paper or grease it lightly.
- Heat the Milk Mixture
- In a medium saucepan, combine the milk, oil, and salt.
- Heat the mixture over medium heat until it just begins to boil. Remove from heat.
- Mix in the Tapioca Flour
- Gradually add the tapioca flour to the hot milk mixture. Stir with a wooden spoon until a sticky dough forms. The mixture will be thick and stretchy.
- Let the Dough Cool Slightly
- Allow the dough to cool for 5–10 minutes so it doesn’t cook the eggs when added.
- Incorporate the Eggs and Cheese
- Add the eggs, one at a time, mixing well after each addition.
- Stir in the grated cheese until thoroughly combined. The dough should be smooth and slightly sticky.
- Shape the Dough
- Using lightly oiled hands or a cookie scoop, form the dough into balls about 1 to 1.5 inches in diameter. Place them on the prepared baking sheet, spacing them about 2 inches apart.
- Bake
- Bake in the oven for 20–25 minutes or until the cheese bread is puffed and golden outside.
- Serve Warm
- Enjoy your Pão de Queijo fresh out of the oven, paired with coffee or as a snack.
Tips for Success
- Consistency: If the dough is too sticky, add more tapioca flour. If it is too dry, add a splash of milk.
- Cheese Options: Experiment with different cheese blends for varying flavors.
- Storage: Store leftovers in an airtight container. Reheat in the oven to restore crispness.
Step-by-Step Brazilian Cheese Bread Recipe Instructions

Preparing the Dough
- Heat the Milk Mixture:
- Combine 1 cup milk, 1/2 cup vegetable oil, and one teaspoon salt in a medium saucepan.
- Heat over medium heat, stirring occasionally, until the mixture boils. Remove from heat immediately.
- Add Tapioca Flour:
- While the milk mixture is hot, gradually stir in 2 cups of tapioca flour. Use a wooden spoon to mix until a sticky, thick dough forms.
- The dough may look lumpy, but this is normal.
- Cool the Dough:
- Allow the dough to cool for 5–10 minutes before adding eggs. This prevents the eggs from cooking prematurely.
- Incorporate Eggs and Cheese:
- Add two large eggs (one at a time), mixing well after each addition.
- Stir in 1 cup grated Parmesan cheese (or a mix of Parmesan and mozzarella) until thoroughly combined.
- The dough should be smooth, elastic, and slightly sticky.
Shaping the Bread Balls
- Prepare Your Hands or Scoop:
- Lightly oil your hands or use a cookie scoop to prevent sticking.
- Shape the Balls:
- Scoop or roll the dough into balls about 1 to 1.5 inches in diameter.
- Place them on a baking sheet lined with parchment paper, leaving about 2 inches of space between each ball.
- Optional Step:
- For a glossy finish, brush the tops lightly with a beaten egg or melted butter before baking.
Baking Tips for Golden Perfection
- Preheat the Oven:
- Set your oven to 375°F (190°C) and let it preheat before baking fully.
- Bake Evenly:
- Place the baking sheet in the center of the oven to ensure even cooking.
- Bake for 20–25 minutes or until the bread balls are puffed and golden brown outside.
- Monitor Closely:
- Avoid overbaking, as this can dry out the bread. Check for a lightly crispy exterior and a soft, chewy interior.
- Serve Fresh:
- Pão de Queijo is best enjoyed warm, fresh out of the oven. Pair it with coffee or tea or as a side to your favorite meal.
Choosing the Right Cheese
Traditional Cheeses Used in Brazil
- Queijo Minas:
- A mild, slightly tangy cheese traditionally used in Pão de Queijo. It has a crumbly texture and melts well, making it perfect for this recipe.
- Variations include Queijo Minas Frescal (fresh) and Queijo Minas Padrão (aged), the latter of which provides a more pronounced flavor.
- Queijo Canastra:
- A regional cheese from Minas Gerais, known for its bold flavor and creamy texture. Ideal for authentic Brazilian recipes.
- Queijo Coelho:
- A firmer cheese with a mild taste, commonly used for grilling but also suitable for Pão de Queijo.
Substitutions Available Globally
If Brazilian cheeses are unavailable, the following can be used as substitutes while still achieving delicious results:
- Parmesan Cheese:
- It provides a salty, nutty flavor similar to aged Queijo Minas. Finely grated Parmesan is used for easy incorporation into the dough.
- Mozzarella:
- A mild and stretchy cheese that mimics the creaminess of Queijo Minas Frescal. Combine with Parmesan for a balanced flavor.
- Feta (Mild or Low-Salt):
- Crumbled Feta can be used for a tangier flavor. Opt for mild varieties to avoid overpowering the bread.
- Cheddar (Mild):
- A widely available option. Use mild cheddar for a closer match to traditional Brazilian cheeses.
- Gruyère:
- It adds a creamy texture and nutty taste, ideal for enhancing flavor complexity.
Blending Cheeses for Flavor Enhancement
- Parmesan + Mozzarella:
- It is a popular combination for achieving the right balance of saltiness, creaminess, and stretch. Use a 1:1 ratio for a well-rounded flavor.
- Cheddar + Parmesan:
- It adds depth with a mix of sharp and salty flavors. It is ideal if you prefer a more robust, cheesy taste.
- Gruyère + Feta:
- Combines nutty and tangy notes, giving your Pão de Queijo a gourmet twist.
- Custom Blends:
- Experiment with your favorite cheeses! Use one for creaminess and another for bold flavor to create a unique twist on the traditional recipe.
Storage and Reheating Tips For the Brazilian Cheese Bread Recipe
Storing Leftovers Correctly
- At Room Temperature:
- If planning to consume the Pão de Queijo within a day, store them in an airtight container at room temperature.
- This prevents them from becoming stale while maintaining their crispy exterior and chewy interior.
- In the Refrigerator:
- Place leftovers in an airtight container for extended storage and refrigerate for 3–4 days.
- Refrigerated Pão de Queijo may lose some crispness but can be refreshed during reheating.
Freezing the Dough for Future Use
- Shape Before Freezing:
- Prepare the dough as usual and shape it into balls. Place the uncooked balls on a baking sheet lined with parchment paper.
- Freeze the balls for 1–2 hours or until firm.
- Transfer to Storage:
- Once frozen, transfer the dough balls to a freezer-safe bag or container. Label with the date.
- They can be stored for up to 3 months.
- Baking From Frozen:
- Preheat the oven as usual and bake the frozen dough balls directly, adding 3–5 extra minutes to the baking time.
- There’s no need to thaw them before baking.
Reheating for Fresh Flavor
- Oven Reheating:
- Preheat the oven to 350°F (175°C). Spread the leftover Pão de Queijo on a baking sheet and warm for 5–7 minutes.
- This method restores their crispy exterior and soft interior.
- Air Fryer:
- For a crisp refresh, refrigerate in an air fryer at 325°F (160°C) for 3–5 minutes.
- Microwave (Quick Option):
- For a softer texture, microwave the Pão de Queijo on medium power for 20–30 seconds.
- This method is faster but needs to restore the crispness.
Nutrition Facts and Benefits
Gluten-Free Properties
- Naturally Gluten-Free:
- Pão de Queijo is made with tapioca flour, a starch derived from cassava. This makes it an excellent option for those with gluten sensitivities or celiac disease.
- Unlike many bread recipes that rely on wheat flour, this traditional Brazilian treat is safe for gluten-free diets without requiring substitutions.
- Versatile for Gluten-Free Lifestyles:
- Its chewy texture and flavorful profile provide a satisfying alternative to conventional wheat-based bread.
High Protein Content from Cheese
- Cheese as a Protein Source:
- The primary protein source in Pão de Queijo is cheese. Each serving offers a protein boost depending on the type used (e.g., Parmesan, mozzarella, or cheddar).
- Approximate Protein Content: One serving (2–3 pieces) provides around 6–8 grams of protein, making it a filling snack.
- Eggs Enhance Protein:
- Eggs in the recipe add another layer of high-quality protein, contributing to muscle repair and overall nutritional balance.
- Ideal for Active Lifestyles:
- The combination of protein and carbohydrates from tapioca flour makes Pão de Queijo a great pre-or post-workout snack.
Adjusting Ingredients for Dietary Needs
- Lowering Fat Content:
- Use reduced-fat cheeses like part-skim mozzarella or light Parmesan to decrease the overall fat and calorie content.
- Replace some or all of the oil with unsweetened applesauce or low-fat Greek yogurt for a lighter version.
- Dairy-Free Options:
- Replace cheese with dairy-free alternatives like nutritional yeast or plant-based cheese shreds.
- Use almond, oat, or coconut milk instead of regular milk.
- Egg-Free Adaptations:
- Substitute each egg with a flaxseed egg (1 tablespoon flaxseed meal + 3 tablespoons water) or aquafaba (chickpea water).
- This adjustment works well for vegans or those with egg allergies.
- Boosting Fiber Content:
- Add chia seeds or ground flaxseeds to the dough to increase fiber while maintaining the bread’s chewy texture.
FAQs About Brazilian Cheese Bread Recipe
Why Is My Cheese Bread Dense?
- Insufficient Mixing:
- The texture may turn out dense if the dough isn’t mixed thoroughly after adding the eggs and cheese. Ensure all ingredients are fully incorporated to create a smooth, cohesive dough.
- Dough Too Dry:
- The dough can become overly dry if the milk-to-tapioca flour ratio is off. Add tapioca flour to the liquid mixture and adjust to maintain a sticky but workable consistency.
- Low Oven Temperature:
- Pão de Queijo requires a hot oven for the tapioca flour to expand and create its characteristic puffiness. Preheat your oven to 375°F (190°C) or higher for optimal results.
- Cheese Choice:
- Using cheese that lacks enough fat or moisture, such as pre-shredded cheeses with anti-caking agents, can result in dense bread. Opt for freshly grated cheese.
Can I Use Regular Flour Instead of Tapioca Flour?
- No Direct Substitution:
- Tapioca flour is essential for the unique texture of Pão de Queijo. Regular flour contains gluten, which changes tapioca’s chewy, elastic consistency.
- Gluten-Free Alternatives:
- If tapioca flour isn’t available, you can experiment with cassava flour (similar but less refined) or a mix of arrowroot powder and potato starch. However, these substitutions may alter the texture slightly.
- Adapting to Regular Flour:
- For a similar bread made with wheat flour, consider trying cheese-based biscuits or gougères (French cheese puffs).
How Can I Make Larger Batches?
- Scaling Ingredients:
- To make larger quantities, multiply the recipe ingredients. For example, doubling the recipe means using 2 cups milk, 1 cup oil, 4 cups tapioca flour, etc. Ensure you keep the ratios consistent.
- Batch Mixing:
- Mix the dough in smaller portions for large batches to ensure even distribution of ingredients. Alternatively, use a stand mixer with a dough hook to save time and effort.
- Freezing for Future Use:
- Shape the dough into balls and freeze them on a tray. Once solid, transfer them to freezer-safe bags or containers. Bake directly from frozen, adding a few extra minutes to the cooking time.
- Staggered Baking:
- If you have limited oven space, prepare the dough ahead of time and bake in staggered batches. Cover the unused dough with a damp cloth to prevent drying.
Conclusion and Why You’ll Love This Brazilian Cheese Bread Recipe
Benefits of Making Pão de Queijo at Home
There’s nothing quite like the satisfaction of homemade Pão de Queijo. By making it yourself, you enjoy:
- Freshness: Warm, cheesy rolls straight out of the oven that melt in your mouth.
- Customizable Ingredients: Control the type of cheese, level of salt, and other elements to suit your taste.
- Dietary Flexibility: Adapt the recipe for gluten-free, dairy-free, or other nutritional needs.
- Cost-Effectiveness: Making these at home is more economical than buying pre-made versions.
- Authenticity: Bring a taste of Brazil to your kitchen, connecting with its rich culinary heritage.
Encouragement to Experiment with Variations
Pão de Queijo is incredibly versatile. Don’t hesitate to get creative:
- Cheese Blends: Experiment with different cheese combinations to find your perfect flavor profile.
- Spicy Additions: Add a pinch of paprika, chili flakes, or pepper for a zesty kick.
- Herbs and Spices: Incorporate fresh herbs like parsley or rosemary for a gourmet twist.
- Mini or Large Sizes: Shape them into bite-sized snacks or larger rolls for sandwich-style servings.
- Sweet Options: Swap the cheese for a mild cream cheese and drizzle with honey for a sweet version.
Call to Action to Try It Today
Why wait? Brazilian cheese bread recipe is quick to prepare and guaranteed to impress anyone who tries it. Gather your ingredients, preheat the oven, and fill your home with the irresistible aroma of fresh-baked cheese bread. Please share it with friends and family or enjoy it as a treat for yourself.
Challenge yourself to explore variations and post your creations online to inspire others. Tag it with #HomemadePãodeQueijo to join the global community of cheese bread lovers.
Start baking today—your taste buds will thank you! 🧀✨
Try this recipe tonight and tag us @biscsweet on social media and follow us on Facebook.